





How to choose the right screen printing ink for each substrate
Printing the same white logo on a cotton shirt, a red polyester shirt and a polypropylene (PP) bottle raises three different concerns. On cotton, the print needs to balance coverage and hand feel. On red polyester, dye can migrate into the white ink film and turn the print pink. On a PP bottle, ink adhesion depends on the plastic grade, the condition of the surface and any pretreatment required before printing.
To choose a screen printing ink, identify the actual surface the ink will contact, check the drying or curing conditions against your shop’s equipment, then run a print trial and test the sample under its intended conditions of use.
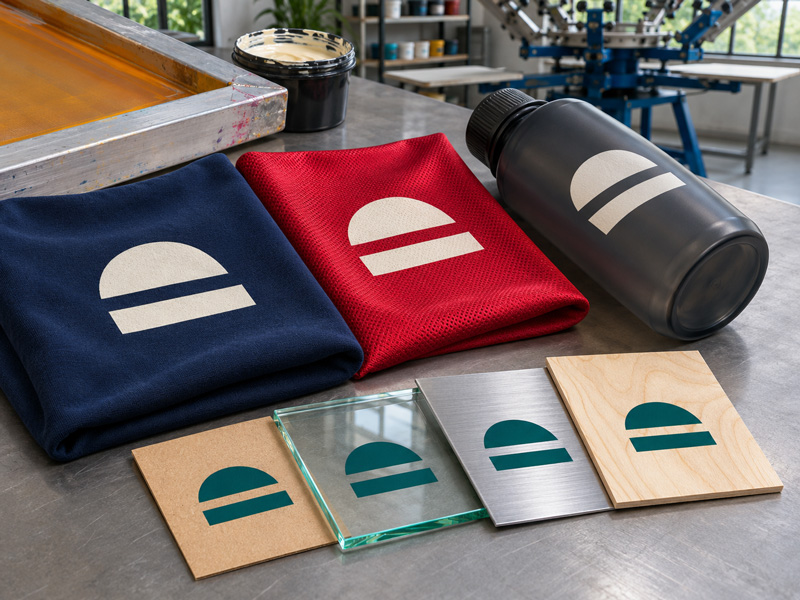
Screen printing ink selection by substrate
|
Substrate |
Ink systems to consider |
What to check on the sample |
|
Cotton |
Water-based textile ink or plastisol formulated for cotton |
Coverage on dark fabric, hand feel and wash durability |
|
Polyester and polyester blends |
Low-bleed ink with a suitable cure schedule. Add a dye-blocking underbase if needed |
Dye migration after curing and after sample storage, and wash durability |
|
Stretch fabrics and nylon |
Ink that forms a stretchable film or an ink system formulated for nylon, depending on the print surface |
Cracking when stretched, adhesion to coated fabric and heat tolerance |
|
Paper and paperboard |
Water-based graphic ink or UV/UV-LED-curable ink specified for the paper or board in use |
Print sharpness, paper curl, cracking at folds and blocking when stacked |
|
PVC, PET, PETG and PC |
Water-based, solvent-based or UV/UV-LED-curable ink specified for the exact plastic and surface |
Adhesion, flexibility when bent and performance on coated or print-treated surfaces |
|
PE and PP |
Ink for surface-treated PE or PP, or a dedicated PP ink specified for untreated substrates |
Wetting and adhesion on the actual plastic lot |
|
Glass, glazed ceramics and metal |
Two-component ink or a specialty ink system specified by the manufacturer |
Adhesion after curing and resistance to water, rubbing or chemicals as required for the end use |
|
Wood and MDF |
Screen printing ink specified for wood or compatible with the panel’s surface finish |
Ink absorption, print sharpness and adhesion to the actual surface |
Choosing screen printing ink for textiles
1. Cotton and cotton blends
For cotton garments, try a water-based textile ink if a soft hand is a priority. If the job requires high coverage and your dryer can meet the ink’s curing requirements, try a plastisol formulated for cotton. On dark garments, test both a high-opacity white ink and a white underbase beneath the print color. A white underbase helps the top color appear brighter and more consistent, but an excessive ink deposit can give the print a heavier hand.
2. Polyester and fabrics prone to dye migration
For dark-dyed polyester garments, especially fabrics that have already been transfer printed, test a low-bleed ink with a low-temperature cure schedule if the fabric is heat-sensitive. If the white ink still discolors, try adding a compatible dye-blocking underbase beneath the color layer.
High-opacity white ink and a dye-blocking underbase serve different functions. The white layer visually masks the fabric color, while the blocker helps keep dye from migrating into the ink film. Check samples after curing and again after storage, since discoloration can develop over time. Follow the ink system’s specified cure schedule, including when using a low-cure ink.
3. Stretch fabrics and nylon
For spandex blends, choose a stretchable ink system and test the sample in the direction the fabric will stretch during wear. If you use an underbase, check the stretch performance of the complete print build.
For nylon jackets or bags, determine whether the fabric has a water-repellent coating or another surface finish. Some ink systems formulated for nylon require a catalyst to achieve adhesion. If one is required, follow the manufacturer’s instructions for the additive, mixing ratio and pot life.
Choosing screen printing ink for paper and plastics
1. Paper and paperboard
Determine whether the paper is coated and whether the finished product will need to be die-cut, folded or stacked immediately after printing. For coated paper and paperboard, start by testing a water-based graphic ink specified for that stock. UV/UV-LED-curable inks are also an option for coated paper or board if the press has a UV source compatible with the ink.
On thin or highly absorbent paper, test a large solid area to check for curling or feathering. If the finished product has folds, check the ink film for cracking at the fold lines.
2. PVC, PET, PETG and polycarbonate
Identify the exact plastic, whether it is a sheet or film, and which side is suitable for printing. For example, Nazdar 4700 is specified for pressure-sensitive PVC film, polycarbonate and PET that has been coated or treated for printing. Marabu Ultra Pack UVC is specified for rigid PVC, PET, PETG and polycarbonate.
If the part will be bent or formed after printing, include that step in the trial to check how the ink film holds up.
3. PE and PP
Many ink systems for PE and PP require corona or flame treatment to improve wetting and promote adhesion. Check the surface wetting tension specified in the technical data for the particular ink, then confirm adhesion after curing.
Some specialty inks, such as Marabu Mara Prop PP, can be used on certain untreated PP substrates. Test on the actual production lot because adhesion can vary between PP substrates.
Choosing screen printing ink for glass, metal and wood
1. Glass, glazed ceramics and metal
Choose an ink for the specific surface, such as smooth glass, anodized aluminum or painted steel. Remove dust, oil and fingerprints before printing. For two-component inks, control the hardener mixing ratio and pot life. Assess adhesion after the ink has fully cured, then test resistance to water, detergents or rubbing as required by the intended use.
2. Wood and MDF
On unfinished substrates, check ink absorption and the sharpness of fine details. If the surface absorbs ink unevenly, try sanding it smooth and applying a suitable primer before printing. On painted, UV-coated or laminated panels, select the ink for the finish that directly contacts it. Nazdar 59000 is an example of a solvent-based ink specified for wood. For MDF or coated wood, verify compatibility on the exact panel to be used in production.
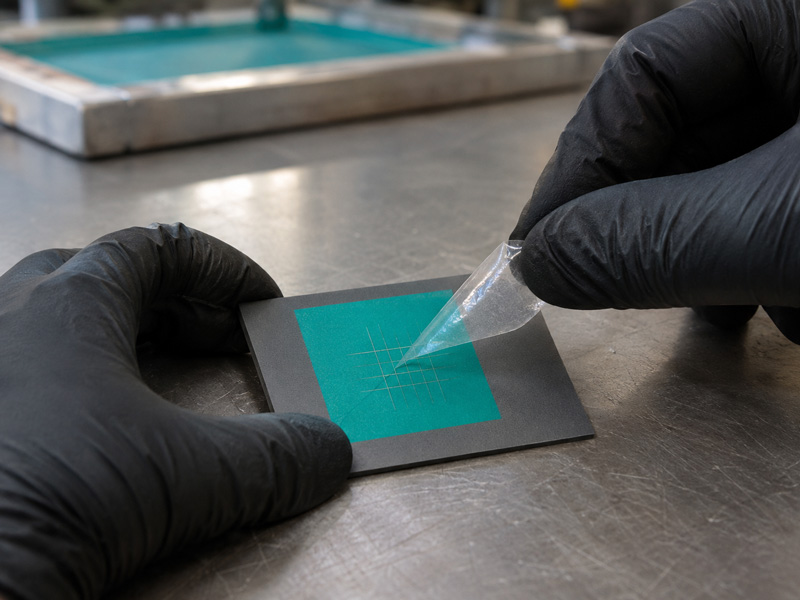
Preproduction testing procedure
1. Identify the print surface
Record the substrate type, lot number, base color, coating and treatment status. Use a sample from the actual production lot.
2. Review the ink technical data sheet (TDS)
Check compatible substrates, mesh specifications, additives and curing conditions. For heat-cured inks, check the time and temperature using the manufacturer’s specified measurement method. For UV/UV-LED-curable inks, check the lamp type, the wavelength for LED systems and the ink’s UV exposure requirements.
3. Run a print trial using the production setup
Use the planned mesh, number of squeegee passes, underbase and dryer settings. Check coverage, sharpness and color after curing.
4. Test for the intended use
For textiles, check wash durability, rub fastness, stretch performance and dye migration as applicable. For plastic, glass or metal, check adhesion and use a crosshatch tape test if it suits the surface and acceptance criteria. For paper, test folding or stacking if the finished product will undergo either of those steps.
5. Retain approved samples and record settings
Record the ink code, additives, mixing ratios, surface treatment and cure schedule so the results can be reproduced on the next lot.
When discussing a job with WORIME, share an actual substrate sample, the print durability requirements and details of your drying or curing equipment. This information helps narrow down the ink systems to test and define the sample approval criteria before production.
